|
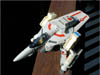
Yamato 1/48 Valkyrie Armored Gerwalk conversion kit
It's hard to believe, but this project was started over a year ago, as a commission by a certain MacrossWorld member (you know who you are). The Armored Gerwalk Valkyrie was a proposal to outfit a Gerwalk mode Valkyrie for ground combat/support. It was deemed too heavy, and diminished the performance of the Valkyrie too much, to ever be useful - so it was never produced. Until now! I hope to produce an armor add on kit for the 1/48th scale valkyrie that is every bit as detailed as the 1/48, yet is unlike most other resin conversion kits - it's easily removeable!
Update 07
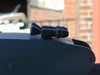
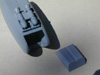
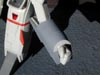
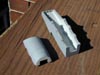
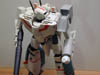
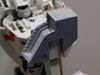
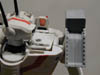
Just a quick update - between the problems with my back, and moving into a new house (moving date is the 14th - woo!), I haven't had much free time to work on this guy. I've gotten only a little bit done on the thrusters - I modified them from single thrusters to double thrusters, because single thrusters would have been lost on such a wide space on the back of the leg armor. Using bits and pieces from Gundam kits, this is what I've got!
Update 06
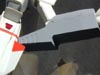
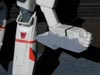
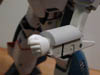
I guess I'm really devoting some time to this project - and here are the results. My original idea for the arm armor had a removeable cover on the bottom, similar to the 1/48 Super Armor missile tips - so I could add some internal details (missile rails and such), and make this more than just an add on armor set. Once I got to thinking about it, it became apparent I needed to think about this feature more. Close examination of the lineart proved my fears - there are no panel lines, or anything indicating that this panel actually exists. So I was left with a dilemma - follow the lineart faithfully, and get rid of this added detail, or go out on a limb, and modify the lineart to make this cover possible (the main reason that I needed a panel line to follow - there would be no way to conceal this seam without gluing and sanding of the armor - which would make a removeable cover useless!). I decided to go the second option - it is my armor, and after consulting with the powers that be, he agreed that the modified lineart (shown in the first image below) was worth the deviation. The rest of the images show progress to date - I've been focusing on the upper arm interface first, and that is almost done, so next is the lower missile cover interface. Then some small detail items, and off to the caster! Onto the pics!
Update 05
Well, here we go again - as with the leg armor, I didn't like how the arm armor was turning out. It had warped from all of the filling and sanding I had done, and the inside surface was very rough. So yesterday I decided to start from scratch - made a couple of sheets of styrene the right shape, with some cutouts and bosses added to mate with the forearm, and then started gluing. I think I made some very good progress, for me, considering I only started on it yesterday.
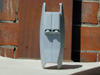
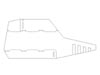
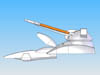
Also, there has been some progress made on the largest and most difficult part of this project - the back armor. At least virtual progress! These are the rough model files that will be sent out to the prototyping shop, and once I get them back, I'll add the appropriate details. The cannons themselves will be hollow - most probably an aluminum tube, with resin cast over it.
Update 04
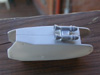
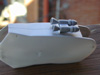
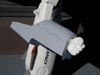
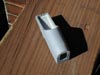
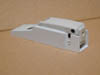
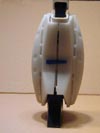
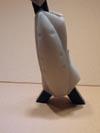
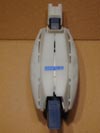
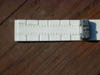
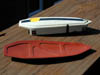
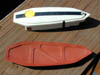
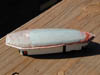
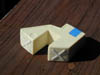
Major update here - true to form, I decided the leg armor didn't look right, so I decided to try something different. I modeled the parts in SolidWorks, made sure they were approximately the right size to fit around the leg (you can see there's a gap between the two halves when they are put on the leg, but that will be taken care of with some sheet styrene). I then sent them to a prototyping shop to have them made. Sure, it cost a little bit of money, but I got in three weeks what would have taken me three to four months to complete. The leg armor halves will be held together by magnets, to make it easy to attach to the 1/48th Valkyrie. No captions this time - just pure, unadulterated pics!
Update 03
Third update - got a good deal done. Made some more parts for the arm armor, and made the first molds for the shoulder armor. Pulled the casts from the molds, and started adding details to them. You'll noticed the raised 'X's on the lower surfaces - those have been removed and replaced with recessed 'X's since these pictures were taken. The first part of the leg armor is also shown - and it all looks really good!
 |
 |
 |
 |
 |
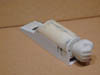
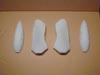
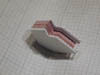
| Arm armor parts |
Arm armor missile rails |
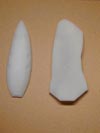
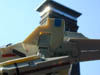
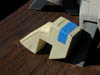
Leg armor |
Leg armor |
Leg armor - outside |
|
 |
 |
 |
 |
 |
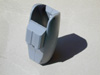
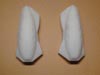
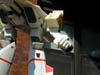
| Shoulder armors |
Shoulder armor detail |
More detail |
More detail |
Even more detail |
|
Update 02
The shoulder armor pieces look much better now - the inside surfaces line up much nicer now, and aligning them with the internal pins is much more accurate. Now I just need to add the external details, and the hinge for the door. The first part of the arm armor is also pictured.
 |
 |
 |
 |
 |
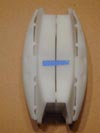
| What's on my shoulder?! |
Oh, put rockets there! |
Way in there... |
Front view |
Arm armor top piece |
|
Update 01
These are pictures of the first parts I made for this project. Ultimately, I decided to scrap these parts, as I was unsatisfied with how they were built, and I figured out better ways to make the parts more accurately. Yeah, that's me - the perfectionist!
|
|